You’ll need a transparent plastic or glass cup to allow light to reach the base.
Fill the cup with purified, filtered, or rainwater. Avoid tap water, which may contain chemicals harmful to orchids.
Position the orchid correctly. Place the lower stem and leaves near the water but keep the crown above it to avoid rot.
Stabilize the orchid. Use a stick or skewer to hold it upright without letting the stem sit directly in water.
Step 5: Encourage Root Growth
For the next few weeks, the orchid will absorb moisture through its leaves, triggering new root growth.
Maintain high humidity by misting lightly or using a humidity tray.
Change the water every 3–5 days to prevent bacteria buildup.
Look for progress—tiny new root tips usually appear within 2–3 weeks. Stronger roots typically develop over 3–5 months.
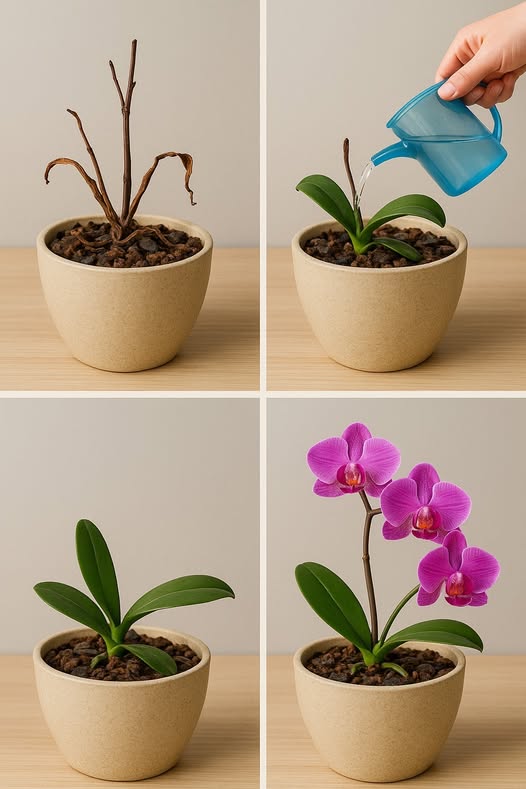
Step 6: Transfer the Orchid to a Pot
Once new roots reach 5–7 cm, the orchid is ready to return to soil.
Use a well-draining orchid mix made from pine bark, peat moss, and sphagnum moss.
Choose a transparent pot with drainage holes so you can monitor root health.
Add a layer of clay balls at the bottom for drainage.
Position the orchid gently and cover the roots lightly with the mix.
Step 7: Provide Proper Care After Potting
Watering: Soak the pot halfway, let the orchid sit for 10 minutes, then drain.
Light: Place near a bright window with indirect sunlight.
Humidity: Mist leaves or use a humidity tray in dry environments.
Fertilization: Once new leaves and roots develop, use a liquid orchid fertilizer.
Final Tips
Be patient—root growth can take months.
Avoid overwatering to prevent another round of root rot.
Watch the leaves: firm, green leaves are a good sign; yellowing or wrinkling means care adjustments are needed.
